#ps asks
Explore tagged Tumblr posts
Note
hi hi hi <33 what fonts did u use on ur barbie gifsets i'm truly in love and i'm SO inspired
Hi, lovely! In descending order:
Multicolore (8pt, 6pt)
Sherlock (120pt, 24pt)
Tw Cen MT (10pt) set to Regular

Those out of the way, I’ll add that I am extremely finicky when it comes to typography, which mostly means that I go through a multitude of different fonts and font combos. I think I had roughly a dozen or so other fonts picked out for the title and annotations alike, so I’ll go ahead and list some of those as well. Great fonts to have even if you don’t end up using them for a Barbie-themed set.
Aaleyah — for “Barbie” title
Avenir (set to 35 Light) — for annotations
Barbie (one of the actual OG Barbie fonts)
Baroneys — for “Barbie” title
Buryland Script — for “Barbie” title
Daylight & Moonlight (set to Light) — for “Barbie” title
DK Sensory Overload — for date
Journey to Thailand — for “Barbie” title
Karla — for annotations
Lobster Two — for “Barbie” title
Montserrat — for date and annotations
Roboto — for annotations
Telegrafico — for annotations
TrashHand — for date
Wired Pop — for “Barbie” title

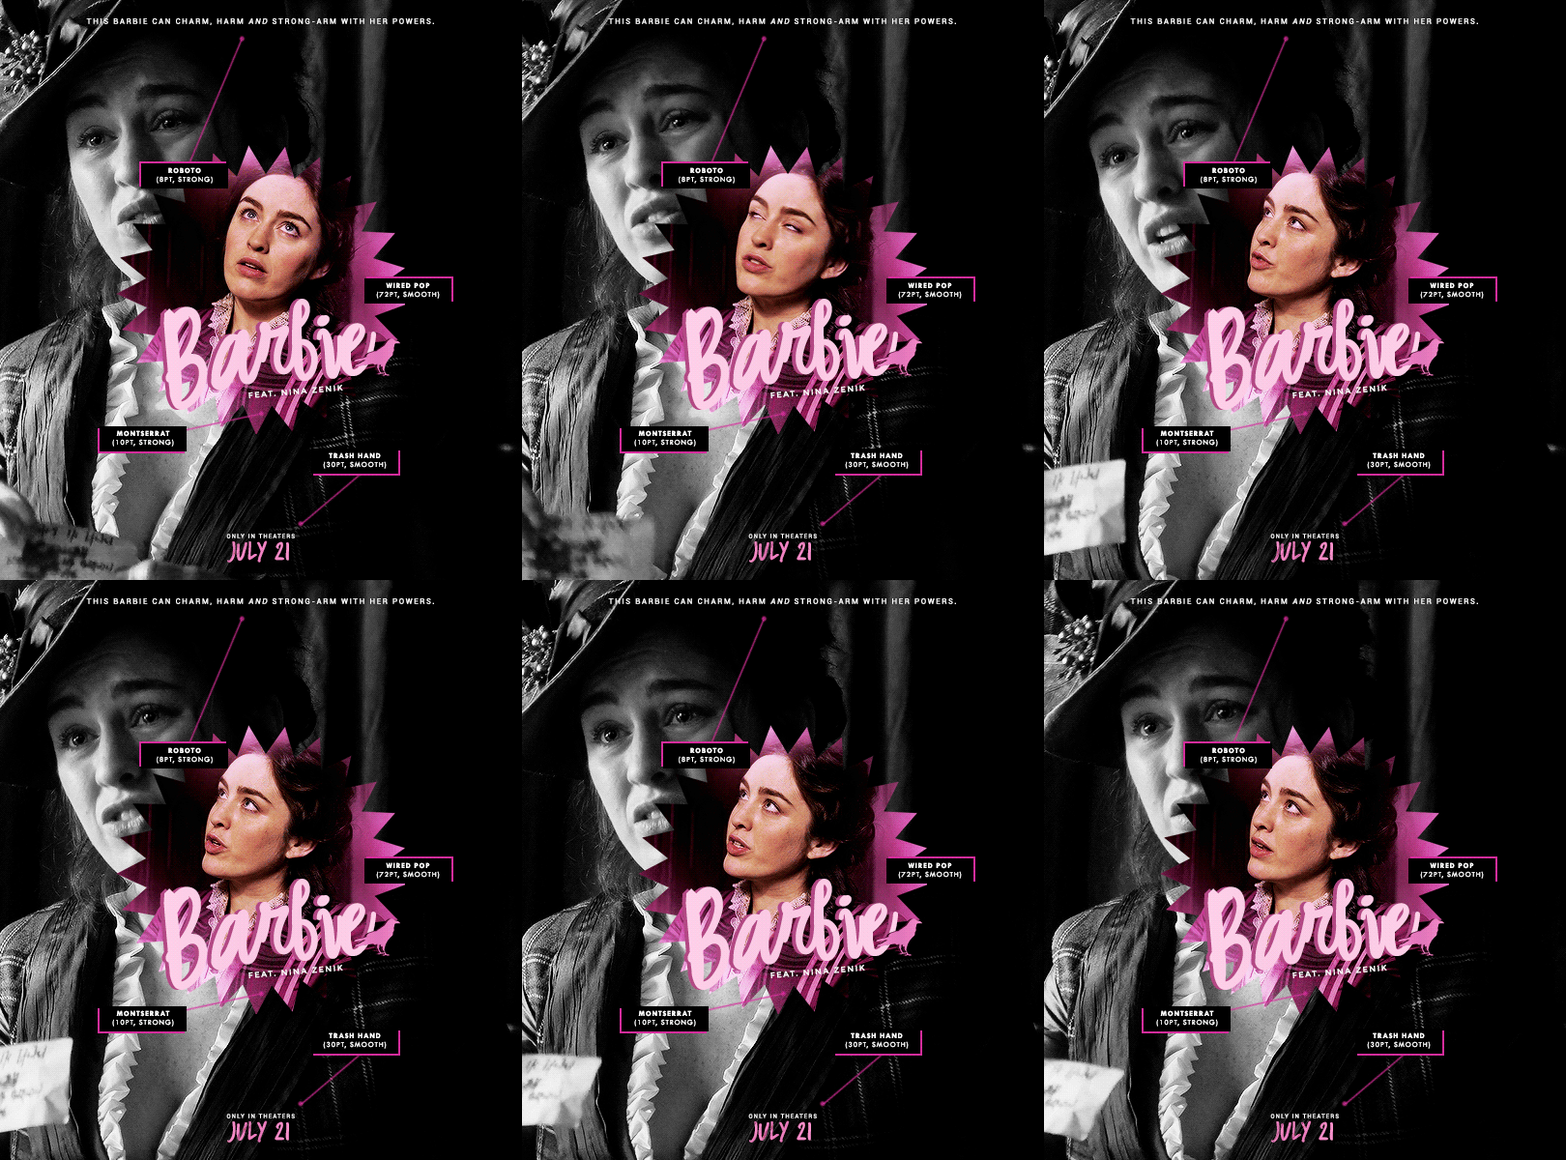
You can find more examples for a bunch of these fonts here and here.
#resources#fonts#uncleroys#ask ava: an organizational tag and not an advice column (unless it needs to be)#ps asks#completeresources#allresources#usergif
351 notes
·
View notes
Text
This quick tutorial will go over how to make gradients, from simple gradients to multicolor ones.
give this tutorial a like/reblog if it helped you out
end result & tutorial under the cut
if questions should arise, feel free to send a message!
Chapters:
how to make a basic gradient
adding colors with brushes
softening & adjustments
What you´ll need:
any version of photoshop (I use CS6, mine is in german because I bought it years ago in germany)
very basic photoshop knowledge
i. how to make a basic gradient
Open a new document in your desired size.
There are several ways to make gradients. I always use the new fill layer option, right next to the new layer or new group buttons on the right side.
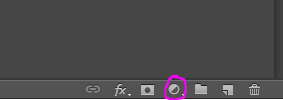
Click on it and select the second option.

Adjust the angle however you wish, and then click on the gradient to bring up the next window
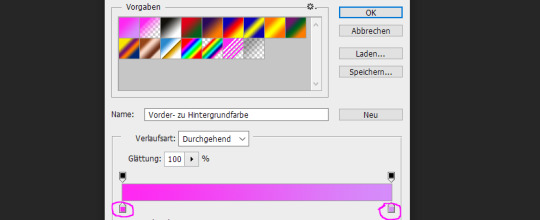
Select any colors you want by clicking on the little droppers highlighted above. I used #ff27f2 on the left and #d58dfa on the right. Once you´re done click OK until your new gradient is on your document.
ii. add colors with brushes
add a new layer & select a big brush with no hardness and low opacity.
select any color to paint with, I´ll be using #e50051 & #770dfa & plain white. Start painting on that new layer in slow strokes. You can add as many colors as you want. Mine now looks like this:
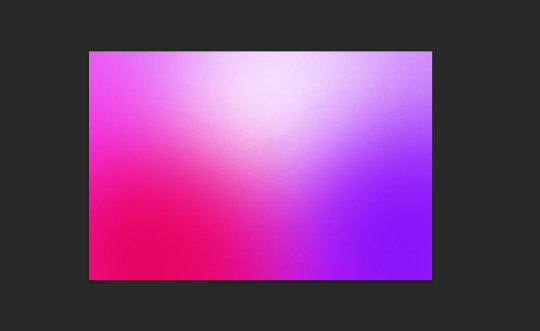
Now we merge our layers by selecting them, then righ click and selecting merge

iii. softening & adjustments
Go to filters -> blur > motion blur

Depending on the gradient you´ll have to select different variables, but for this one I used the numbers below:
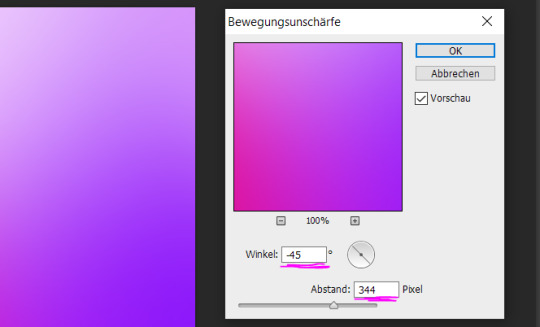
Sometimes I add Gaussian Blur too to blend it even more, but didn´t do that for this gradient.
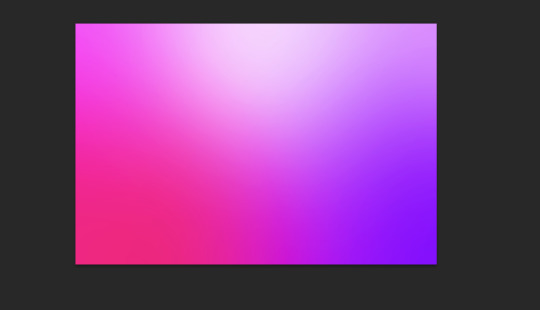
Now for the adjustments I only added a brightness and vibrance layer. This is the finished gradient:
#completeresources#dailyresources#photoshop tutorial#gradient tutorial#photoshop help#usernelly#userireland#ps asks#mine: tutorial#my tutorials#my resources
177 notes
·
View notes
Note
I know you've been asked this before I just can't seem to find the answer. How do you export your gifs so that they come out so smooth?? They're beautiful! Mine always come out super grainy.
Hey, thanks! It really depends on the gif itself, but my usual go-to for making sure that the gifs come out as 'clean' as possible is to try and limit the color range I use for the gifs (gif format has a 256 color limit) so the tones blend in a nice gradient.
As for the export settings, I usually go for 'pattern' dithering (just personal preference, I know a lot of gif makers use 'diffusion') and then for color reduction algorithm I just see which one looks the best for each gif (and also depends on the final file size).
For example, in my latest gif set, I used these settings:

For this gif specifically:

The wonderful Ava goes into great detail explaining a lot of what I'm talking about in this post, so make sure to read through it with examples to see what I mean!
7 notes
·
View notes
Note
To all the supporters of Palestine 🙏
We still need less than 1350€ to reach our short term goal of 50% ‼️
Your donations are important for our survival
Please help me reach our goal as soon as possible 🙏
We appreciate your help ❤️🙏
Vetted
please support
7 notes
·
View notes
Note
hey! i was wondering if you could show how to make the gifs in such good quality, how you get the episodes, I'd like to get some clips from different scenes that I liked. Plsssss
Hey! 💕 So, for the gifs to have good quality, I always use 1080p videos, never lower unless I really can't find anything better, in which case I might go with 720p. My laptop doesn’t support 2160p, so I don’t use that.
For sharpening, I use these settings


And when it comes to coloring, I always do it from scratch. I don’t use PSDs, I color every gif set as I make them. I try to keep the colors natural but more vibrant. For 911, especially season 1, episode 1, I try to tone down the yellow tint.
If anyone’s interested, I could try making a tutorial, but honestly, it would be the blind leading the blind 😂. And as for where I get the episodes, just message me privately, and I’ll try to help with that.
6 notes
·
View notes
Note
what font do you use for your gifs? thanks in advance !
hi! I use Arial Rounded Mt font, with bold and itallics on. I normally use size 14-16 depending on the Gif size, but for bigger gifs I use size 18.

9 notes
·
View notes
Note
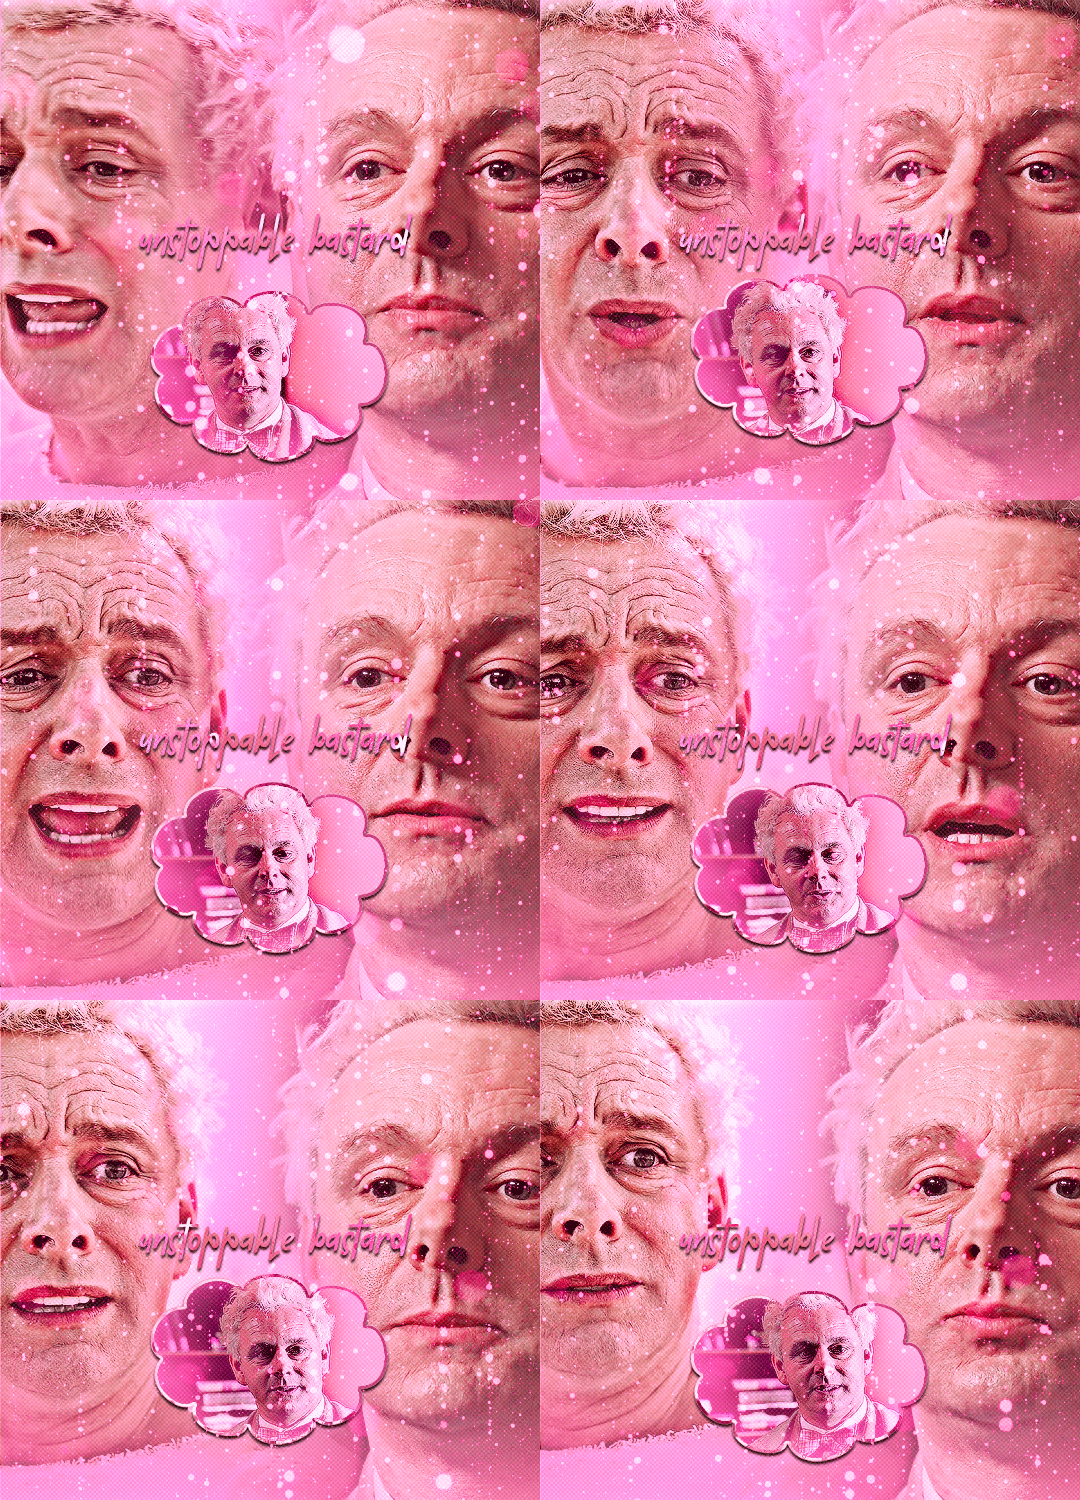
hi! sorry if you've already answered that but, i saw your good omens (the unstoppable bastard/immovable dumbass one) and i really loved it, i found it so artistically and aesthetically beautiful. frankly i am in awe with it and i was wondering if you'd be willing to share some tutorials on the effects you used for the gifset (like the puzzle piece and heart for example)? do you maybe already have a tutorial tag that i could go through? thank you so much!
hi! first of all, thank you!
to do a similar effect like i did in this post or something like the transition in the last gif of this lovely edit firstly you will need to either find (on stock sites) or make yourself (from a youtube video or using shapes in photoshop) a gif that has a simple shape and a transparent background.
a little tutorial under the cut (assuming you know the basics of gifmaking) (this may not be the best/most efficient way to do it but it's the way i'm used to).
for example, i made the heart gif using photoshop's custom shape tool, repeatedly pasting it on different layers, resizing so it would look like a beating heart and making frames from it (you could probably find something better on the internet):

the puzle was something i found on some stock, deleted the frames i didn't need, removed white background and painted with black brush (not really necessary since we'll be dealing with shapes, just easier to work with) so i got this:

i made the rest of the small gifs in the same way: floating cloud moving the base photoshop cloud shape up and down, moving the strip (also found in the custom shape tool) like in this youtube tutorial and manually rotating the shape of a star shape i found on some stock.
now that you have you desired shape gif, select all the frames and make sure they have the same delay time:
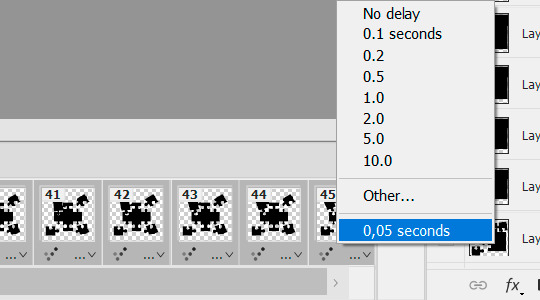
press convert to the video timeline:

select all the layers:
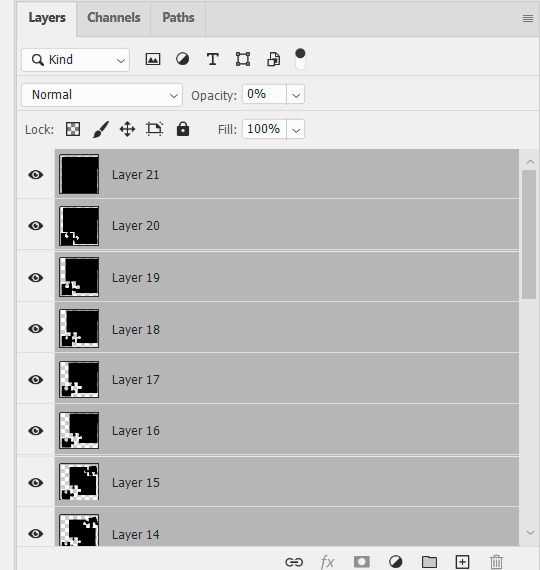
filter > convert to smart filters:
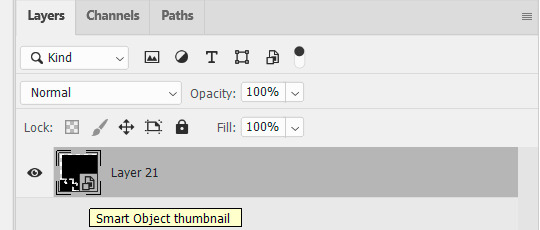
upload the exact same amount of frames for your scene gif (i'm using 45 frames here), resize, set delay time exactly the same as you did for your shape gif (i set 0,05 but it doesn't really matter, they just need to match) & convert frames to smart filters as you did for the shape gif. this is where i usually do my sharpening (not on the sceenshot because i reused another gif, but that's not relevant here).
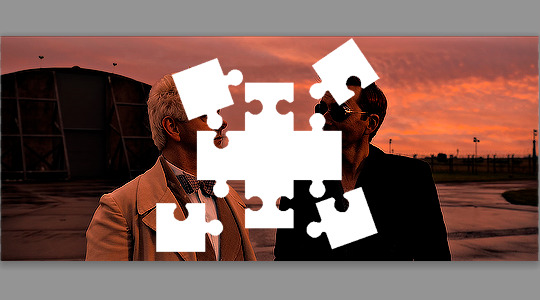
now put the shape gif on top of the scene gif, resize it and position it to your liking (i switched the colors for better visibility):
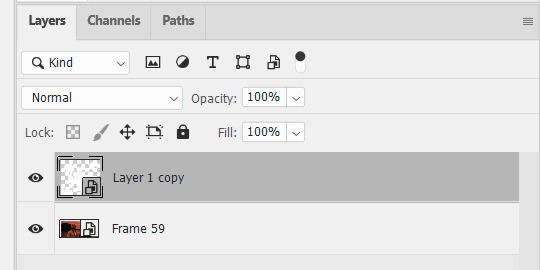
your timeline shoud look like this & the duration of both sets should match because you used the same amount of frames and set the same time delay:

the gif currently looks like this:

after you're more or less satisfied with the position of the shape gif (you can change the opacity back and forth to figure it out), put the shape gif under the scene gif:
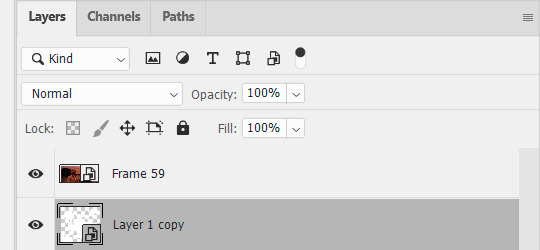
right click on the scene gif > create clipping mask. now you have this:
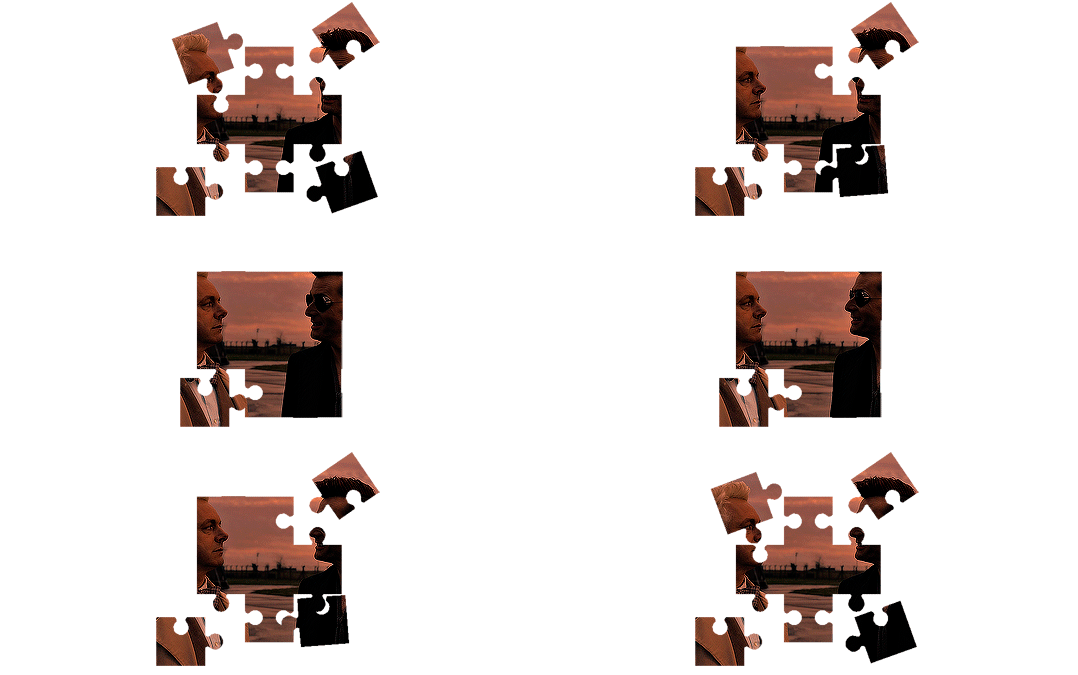
color it to your liking:
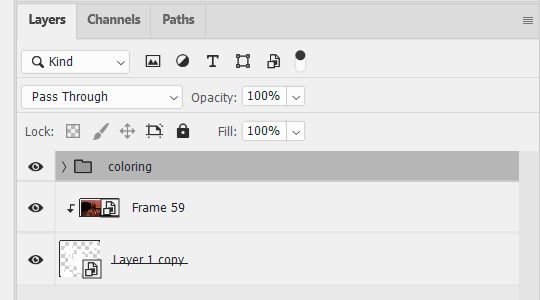
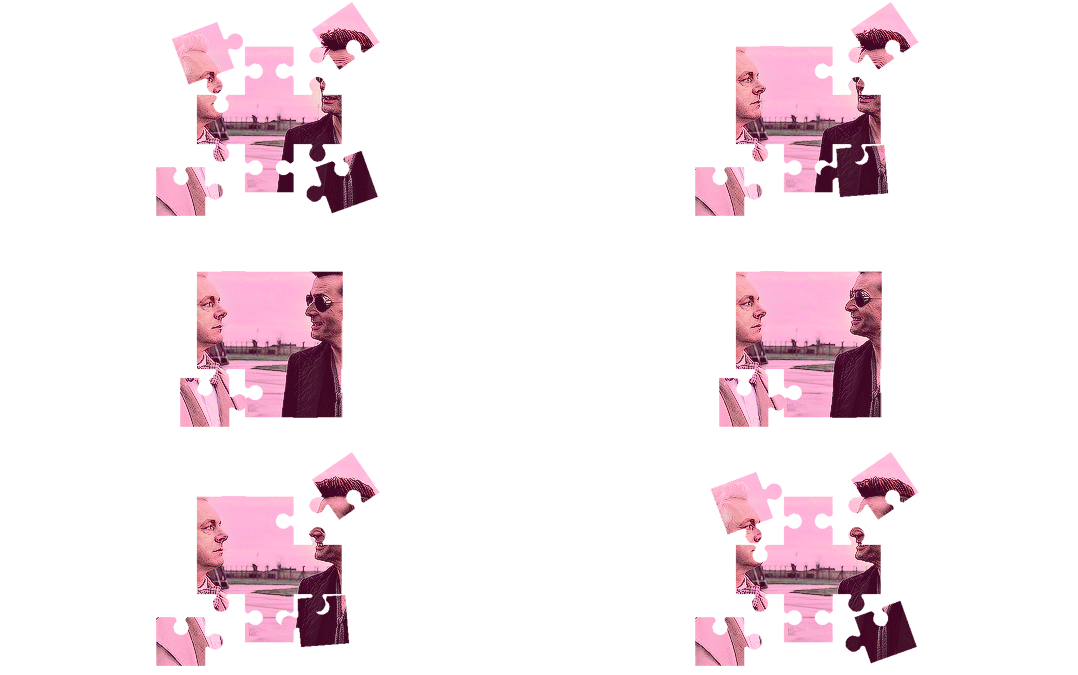
optionally. to make a border like i did make 2 copies of the shape gif and put them on top of the colored gif:
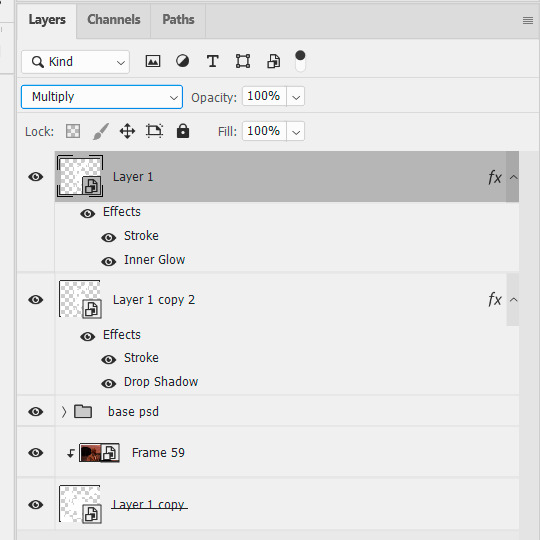
change blending mode for both: multiply if your shape gif is white, screen if your shape gif is black. set layer style for the first one:
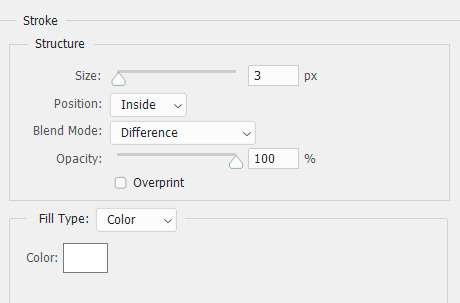
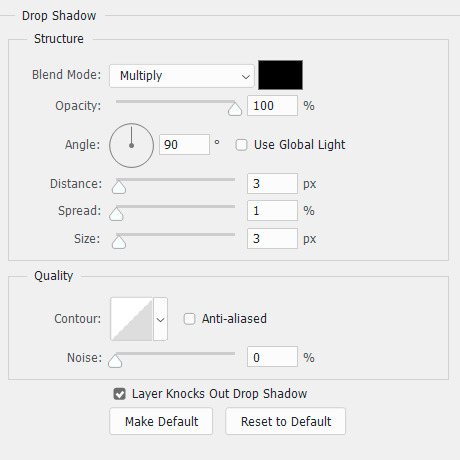
and for the second one:
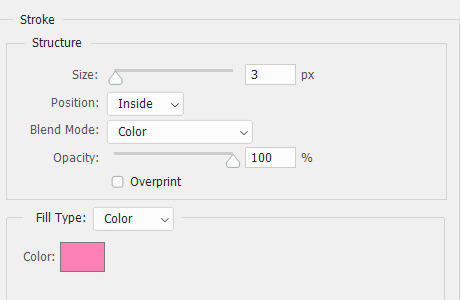
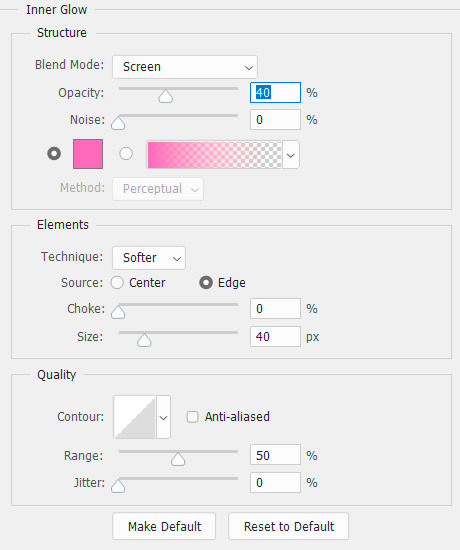
(use any color you want and/or skip inner glow alltogether).
currently we're still in video timeline and our gif looks like this:
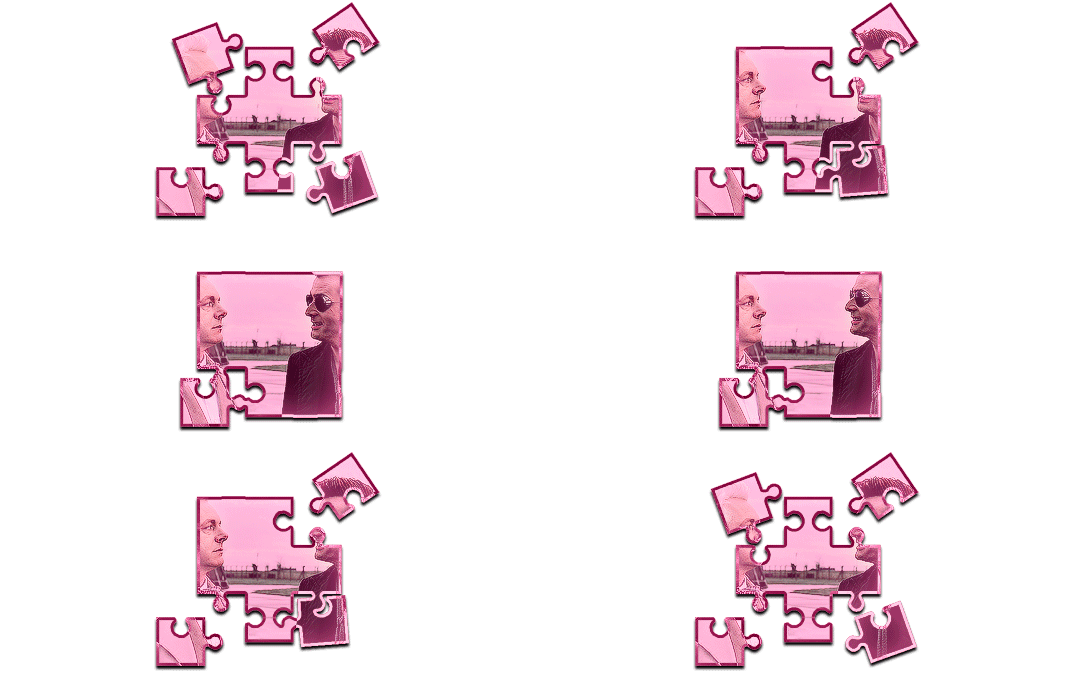
time to put it on top of a bigger gif. click here:

convert frames > flatten frames into clips. now convert to frame animation:
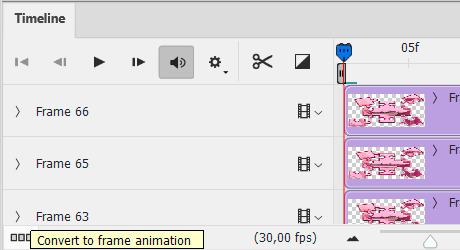
delete the frame that has the least amount of delay (0,07 in this case):
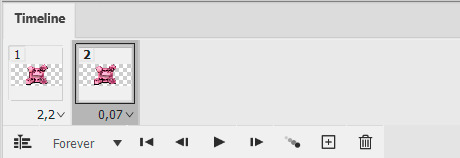
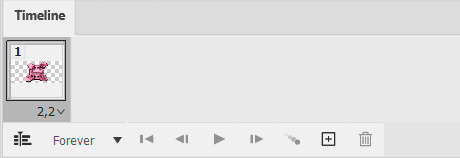
make frames from layers (in the timeline menu on the right) and you get a variety number of junk frames before the actual gif starts that you also need to delete (i have 28 in this case):

make sure there's no junk after the gif, set your delay time and delete unnecessary layers if you want (or not, it doesn't really matter):

select all the remaining layers and group them (easier to work with later):
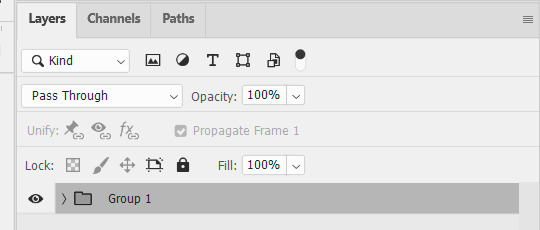
now select all the frames, go to the timelines menu > copy frames. open the gif you want to paste them on top of, select all of its frames, go to the timeline menu > paste frames > paste over selection > ok.
postion it how you want to and that's finally it.
#it really is much easier to do than it might look like from my explanation#replies#ps asks#ps tutorial#cowboycoven2
21 notes
·
View notes
Note
your gif tutorial is the reason why i started making gifs so thank you so much !!
i don't know if you'll answer or if you'll even have a solution to my problem but here i go:
like in your tutorial i use OBS to record videos i can't download, i open the recorded video on PS, make a gif, crop, sharpen, color, brighten like in the tutorials.
the first gif i save is perfectly fine and with the coloring i chose for it. while for the second gif from the same video timeline will come out without everything except the sharpening. the coloring and brightening disappears on the others i make.
i noticed that it doesn't happen on videos i download with 4k the coloring and brightening works and the many gifs i'll make from these videos.
do you have perhaps a solution or an explanation i think it's linked with OBS but i don't know what to do...
thank you !
Hi Anon, I'm so glad the tutorial was helpful! I hope you're having fun making gifs.
I believe your problem has nothing to do with OBS but rather with how Photoshop video timeline works! If you put the adjustment layers on the same video group as your clip, they will not show up in the timeline, and you might not notice that the adjustment layers aren't active throughout the length of the clip.
Here's an example:


The layers Selective Color 6 and Curves 1 are in the same video groups as the clips, and they won't be shown in the timeline. They are however the same length as Layer 1 copy, 2 and not the entire clip (Layer 1 copy 2 and copy 3 are all the same clip, I've just cut off parts I'm not using so the clip isn't too long). But you wouldn't be able to see that, so they appeared to have "disappeared" if you try to make gifs from further down the clip. The same thing happens if you drag adjustment layers between files, they will follow the length of the clip in the original file.
The solution to this is to either drag the adjustment layers on top of Video Group 1 so you can see the length of the adjustment layers and adjust their duration so they apply throughout the clip length:


or create a new folder before you create any adjustment layer, and then put all the adjustment layers in the folder. The adjustment layers in the entire folder will be the same length as the clip.
Hopefully this solves the problem! Don't hesitate to send an ask or DM me if you still have questions :]
#.asks#Anonymous#PS asks#I simplified the adjustment layers for the example but it actually took 15 of them to get the coloring I wanted out of it lmao#I love talking about Photoshop... haven't made any creative gifsets in fucking Forever though I don't know if I still remember how
4 notes
·
View notes
Note
hiii, your crowley gifset is INCREDIBLE! i would love to know how you managed to get the purple and blue hues but kept crowley looking normal? every time i try messing around with hues i end up with very oddly coloured people 😅
thank you so much!!🥰
i mostly use selective colour layers to get the colours i want. if you’re playing around with blues for example that usually doesn’t mess with skin colour.
but i’m also an avid user of layer masks because then you can control which parts of a gif are affected by your colouring. so if a layer turns your person’s skin a funky colour you can just paint over them with the layer mask and remove the colouring from them. it’s super handy!
#ask#ps asks#hope this helps ☺️#i’ve got some tutorials on my blog that you can check out too#they’re pretty old at this point but a lot of the points still stand
1 note
·
View note
Note
omg i love your gifs so much, they always look amazing. i have a question if you don't mind, what are your sharpening settings?, your gifs look so smooth and have amazing quality. mine look grainy
Hiya nonnie, thank you soooo much darling! <3333 So I've got asked this a lot & I have a standard response (please don't be disappointed):
More details under the cut, coz this got longer than I thought.
Moral of the story: I use the standard sharpening settings, but I'd say, pay attention to the colouring as well, as that can mask some of the graininess that oversharpening can introduce.
I can't stress on colouring enough (and maybe I'll die gatekeeping it lol) - it's a game changer. It honestly doesn't get talked about as much, which is a shame really.
Linking some awesome colouring tutorials:
https://www.tumblr.com/arabellas/750386240321454080/hi-i-hope-its-okay-to-ask-i-love-your
https://www.tumblr.com/arabellas/746043238726746112/about-the-tutorial-just-one-about-dark-scenes-in
https://www.tumblr.com/arabellas/744683449531678720/do-you-have-a-coloring-tutorial-your-gifs-are-so
https://www.tumblr.com/rhaenyratargaryns/743626191546761216/hi-i-love-ur-buffy-gifs-so-much-they-always
https://manny-jacinto.tumblr.com/post/645393544481243136/coloring-tutorialtips-for-gifs-by
You can find many more tutorials in the #gif tutorial tag. And do follow handles like @pscentral @psresourcess @rresources @usergif @clubgif who repost tutorials for beginners and experts. Additionally, the links I’ve added in my main answer—those users have plenty of other well-endorsed tutorials to make you freak out on Photoshop :)
Happy giffing and welcome to the content creator community <3
1 note
·
View note
Note
hi! first of all i wanted to say i'm obsessed with your shadow and bone gifsets (all your gifsets tbh, you're super talented!), i was wondering how you were able to get the glitches on this gifset to be green & yellow like that? i just can't figure out how to change the colors like that using my normal method of using the rgb channels and i love the way the green and yellow works: /post/712882007539171328/and-yet-they-hesitated-the-knowledge-that-they
Gosh, thank you so much. You'd think after years of doing this, I'd be a little more equipped to handle compliments, but I still get flustered like it's the one of the first times all over again.
The set in question for anyone else wondering or trying to mess around with 3D/glitch effects and changing up the colors. And here is another example.
Hopefully this makes sense (and feel free to reach back out if it doesn't!) but I don't actually touch the RGB channels at all—or, at least, not later on in the process to actually shift the colors around. First, I do the default setting for the basic 3D effect, which is just the channel for reds activated:
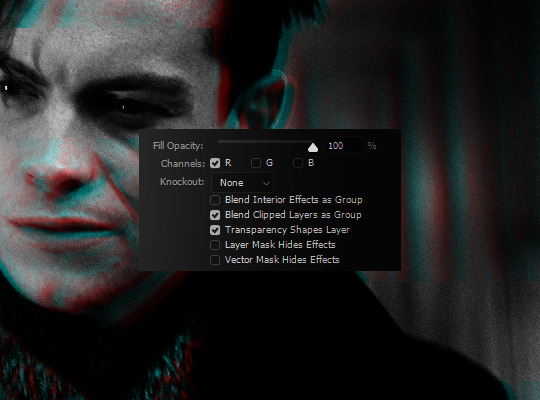
And then this is where the Hue/Saturation adjustment comes in handy. Because red and cyan are already such isolated color points, it means it's a piece of cake to shift both around as you see fit. I knew the final products (with the film and light leak overlays) were going to be orange-yellow and green, so I shifted my Reds to the right to be more yellow and my Cyans to the left to be more green.

As another example, here's pink and purple:
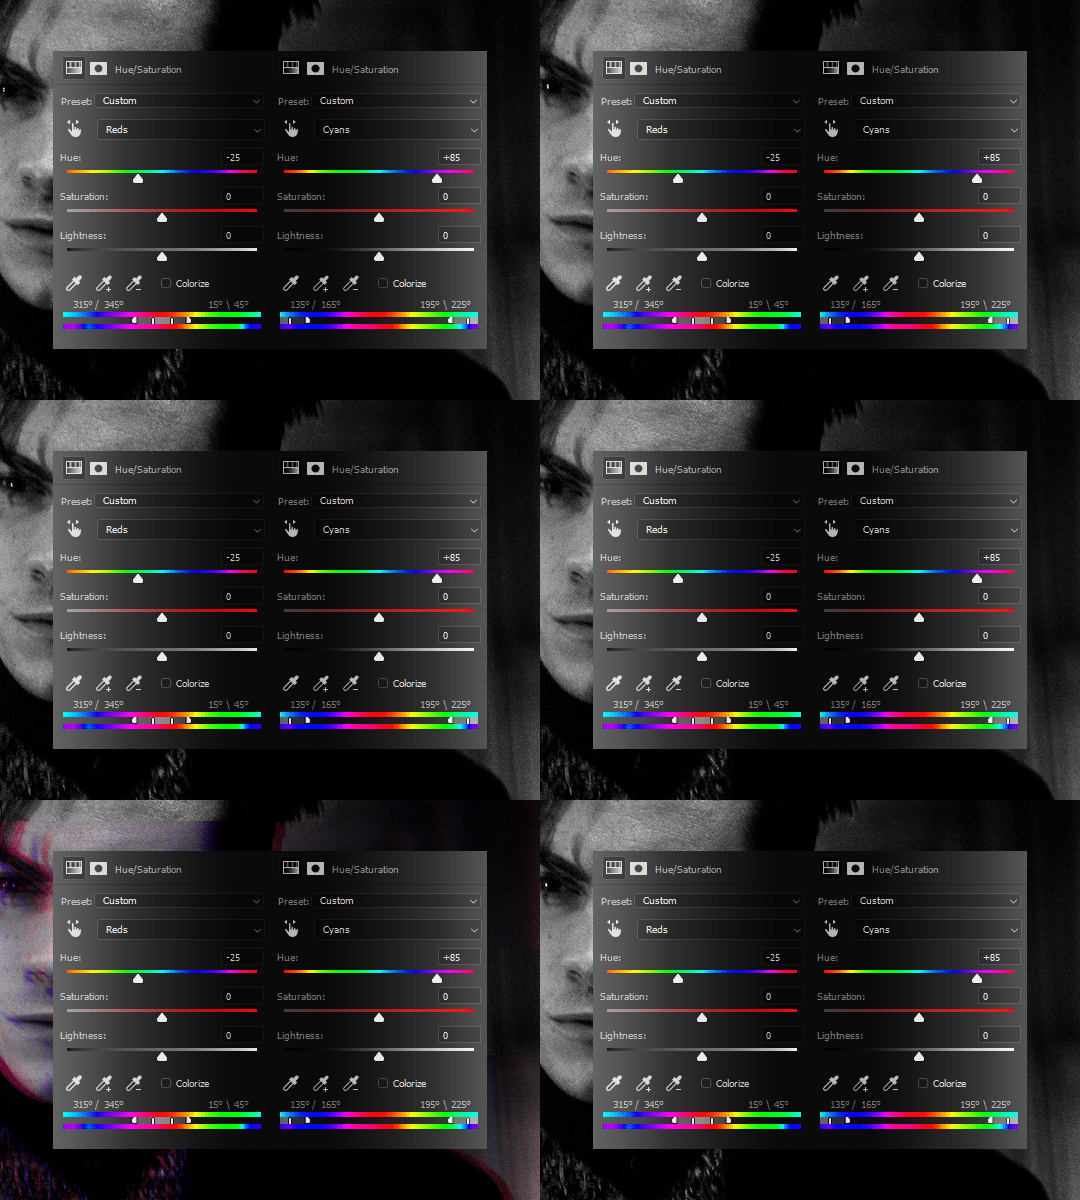
Keep in mind that working with a B&W base also makes things exponentially easier and that won't always be the case. Obviously, when your base gif isn't black and white, there are going to be reds and/or cyans (or greens and purples, if you tick off the G channel; or blues and yellows, if you tick off the B channel) so it requires a bit more effort and work in making sure that only your glitch layers are affected.
#aridante#ask ava: an organizational tag and not an advice column (unless it needs to be)#ps asks#usergif
130 notes
·
View notes
Note
hi, this edit is awesome ✨
https://www.tumblr.com/ijzermansdriesen/751292130795880449?source=share
Would you please post a tutorial for those gifset?
Hi anon, thank you so much for liking my gifset 💕.
I would like to direct you to two tutorials which will help you make any such gifs
This tutorial by @usergif on clipping and vector masks
and
This tutorial by @izzy-hands on making small hexagonal gifs on the larger gif.
What I just did was find a heart clipart/ template on the web and adjusted it on Photoshop to give me the shapes for clipping the gifs.
#anons#ps help#If you still have some questions you can ask and I will try my best to explain#hope this helps anon#asks#ps asks
0 notes
Note
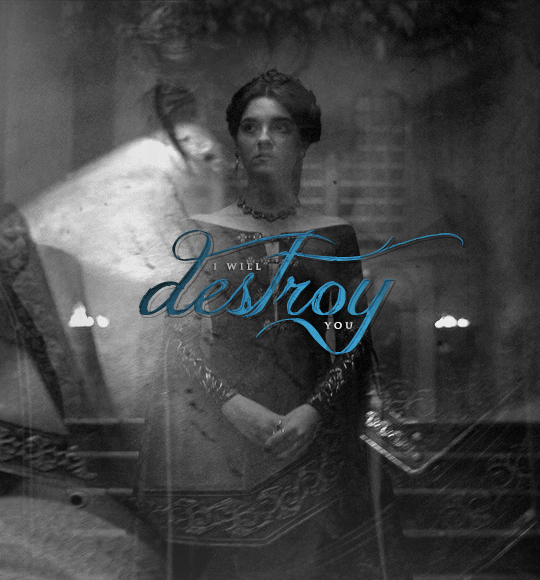
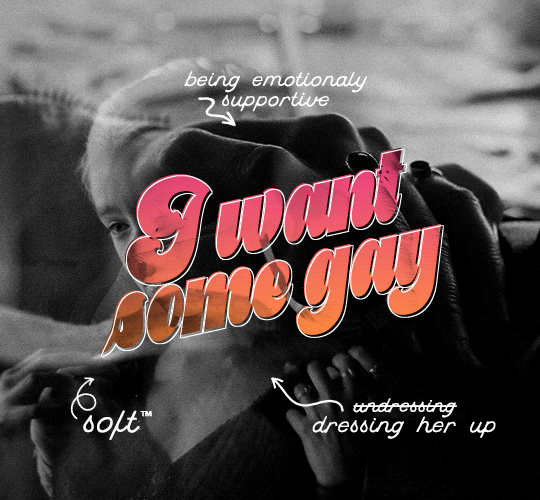
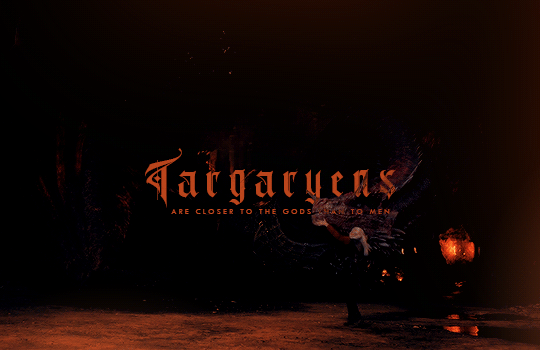
hi. can you tell me the name of the font from here post/696133788008382464 "destroy", post/694016158045782016 "soft", post/691767228127985664 "Targaryens", pls
Hi! The first one from this post is Jellyka Delicious Cake.
The second one from this post is Buffalo Script.
And the last one from this post is Lordish.
6 notes
·
View notes
Note
Hello from Gaza,
I hope you're doing well. My name is Waleed, and I’m reaching out in the hope that you might be able to help. My 3-year-old son, Ayman, is suffering deeply from the freezing cold, hunger, and lack of basic necessities in Gaza💔. For over 13 months, we’ve been living in constant fear, and now, with winter upon us, it’s become even harder to keep him warm and safe🥺.
I’ve started a GoFundMe campaign to raise funds for our most basic needs and to escape this ongoing nightmare. Any donation, no matter how small, would make a huge difference. If you can’t donate, simply sharing our story would mean the world to us🙏.
Thank you so much for your time and consideration. Your help, in any form, can truly change our lives.
With gratitude,
Waleed family
https://gofund.me/e85369a1
vetted, please support
2 notes
·
View notes
Note
hi! this is the anon from before i love all your challengers sets so far but especially the one of the different art/patrick scenes altogether the coloring was so beautiful <3
HII!! waaaah thank youuuu so muchhh, I APPRECIATE IT ANON! 💕 ok HERE'S the psd !
ok so like...THEY SHOULD BE DECENT, BUT YOU PROBABLY WILL HAVE TO ADJUST SOME LAYERS OFC! i only used these for the gifs i made in that specific set so they might not match other scenes too well :o The one named "pat and art match !!!!" is pretty good for the usual outdoors scenes and scenes that aren't too yellow. The one named "pat and art room !!!!!" is pretty good for scenes that are yellow (i assumeeee) because i used that one for the motel room scene LOL. GOOD LUCK!!! may the odds be ever in your favor
#ask#anon#ps asks#U CAN SEND ME ANY OTHER QUESTIONS IF U HAVE ANY JDFHGBHFJD#HOPEFULLY IT WORKS OUT THO :D
0 notes
Text


Halloween comic two weeks late bc i will never let tamadrien die
#ml#miraculous ladybug#adrien agreste#ohshc#ouran high school host club#ouran#tamaki suoh#undescribed#I might go back and do alt text later but I am so tired lol#PS anon who asked me to draw more tamaki and adrien stuff like months ago#sorry it took so long fjkdkdkd I will probably do more tho#mine#my art#halloween#tamadrien
4K notes
·
View notes